There’s a quiet irony to converting Apple Music to ALAC. Apple Music already is ALAC. The lossless tier of the catalog is encoded in Apple Lossless Audio Codec from the ground up, so on paper you’re not changing the format at all. What you’re really after is something else: clean, portable, DRM-free ALAC files that you actually own, that sit on your own drive, and that move freely between your devices without Apple’s playback rules getting in the way.
That distinction matters, and most guides gloss right over it. So before you start hunting for a converter, it’s worth understanding what ALAC is, why your streamed files are locked even though they’re technically already lossless, and how to end up with a library that keeps every bit of that original quality. This guide covers all of it for 2026, including the settings that quietly downgrade your audio if you’re not paying attention.
What ALAC actually is
ALAC stands for Apple Lossless Audio Codec. Apple built it to compress audio without discarding any data, which is the whole point of “lossless.” A track encoded in ALAC sounds identical to the master it came from; the compression only shrinks the file size, a bit like zipping a document without losing a single word.
The entire Apple Music lossless catalog runs on ALAC at resolutions from 16-bit/44.1 kHz, which is standard CD quality, up to 24-bit/192 kHz for Hi-Res Lossless material. Apple splits this into tiers you can pick in settings: CD quality at 16-bit/44.1 kHz, standard Lossless up to 24-bit/48 kHz, and Hi-Res Lossless reaching 24-bit/192 kHz. All of it streams at no extra cost on a subscription.
ALAC files usually carry an .m4a extension, which confuses people because lossy AAC files use the same extension. The container is the same; the audio inside is what differs. An ALAC .m4a is lossless. An AAC .m4a is not. You can’t always tell them apart by the file name alone, which is exactly why people get tripped up.
Why convert to ALAC when Apple Music is already ALAC?
Fair question, and the answer comes down to ownership and freedom of use, not format.
Streamed Apple Music tracks are wrapped in FairPlay DRM. That protection ties the file to your account and to Apple’s apps. You can’t drop one onto a USB stick, hand it to a friend, load it into a non-Apple media player, or keep it after your subscription lapses. The audio is lossless, but it’s borrowed, not owned.
Converting to ALAC means producing a standalone, DRM-free ALAC file. Same Apple Lossless quality, but now it’s a normal file you can archive, back up, sync to a NAS, play in VLC or foobar2000, and keep indefinitely. For anyone building a permanent music collection inside the Apple ecosystem, that’s the appeal: you stay in the format your iPhone, Mac, and HomePod natively prefer, while losing the leash.
The protection layer is the real obstacle here, and it’s worth understanding how it behaves across different systems before you commit to a method. There’s a thorough walkthrough of dealing with protected Apple Music on PC or Mac that explains why a plain right-click-and-save never works and what actually does.
ALAC vs. FLAC: which lossless format should you pick?
If you’re choosing between ALAC and FLAC, here’s the short version. They’re sonically identical. Both are lossless, both preserve the full master, and no human ear can tell a properly converted ALAC file from its FLAC twin. The choice is entirely about where you listen.
ALAC is the native citizen of the Apple world. iPhones, iPads, Macs, Apple TV, and HomePods all handle it without a second thought, and it tags beautifully inside the Music app. FLAC is the open-source standard that dominates everywhere else: Android, hi-fi streamers, car systems, most dedicated music players.
So the rule of thumb is simple. If your listening happens mostly on Apple gear, ALAC keeps everything tidy and fully supported with no compatibility surprises. If you live across Android and various hi-fi boxes, FLAC asks fewer questions. Plenty of people keep an ALAC library for the Apple side of their life and convert copies to FLAC for the rest. Neither sounds better than the other; they just get along with different hardware.
The one rule that decides whether your ALAC is truly lossless
This is the part that separates a real lossless library from a fake one. An ALAC file is only as good as the source it came from.
Convert a genuine lossless source to ALAC and nothing is lost. The audio data carries over intact, bit for bit.
Convert a lossy source — a standard AAC stream, say — to ALAC and you do not get lossless audio back. The detail that was already thrown away during AAC compression is gone permanently. Wrapping it in ALAC just makes a larger file containing the same compromised sound. People do this constantly, then wonder why their “lossless” collection sounds no different from before. The container on the outside can’t restore what was discarded on the inside.
The takeaway: to end up with true Apple Lossless ALAC, you must start from a lossless source. With Apple Music, that means switching Lossless on before you do anything else.
Turn on Lossless first
On iPhone or iPad, open Settings, go to Music, then Audio Quality, and turn on Lossless Audio. You can set Lossless or Hi-Res Lossless independently for streaming and for downloads.
On a Mac, open the Music app, go to Settings, then Playback, and enable Lossless under Audio Quality. The Windows Apple Music app hides the same toggle under Settings and Playback.
Watch out for one trap: songs you downloaded earlier at a lower quality won’t upgrade on their own when you flip the switch. You have to delete those downloads and grab them again so Apple sends the lossless version. Skip this step and you’ll be converting from compressed files without realizing it.
Method 1: Convert your own files to ALAC (bit-perfect and clean)
This is the most straightforward route, and it’s genuinely lossless.
If you own music — CDs you ripped, downloads you purchased, or FLAC files you collected — none of that carries DRM, and you can convert it to ALAC with zero quality loss.
The fastest built-in option lives inside the Music app itself. On a Mac, go to Settings, then Files, then Import Settings, and set the import format to Apple Lossless Encoder. Then select your tracks and choose File, Convert, Create Apple Lossless Version. Done. For batch jobs with better tagging control, free tools like XLD on Mac or fre:ac on Windows and Mac handle ALAC output cleanly too.
A practical workflow looks like this:
- Gather the files you want to convert into ALAC.
- Set your tool’s output format to Apple Lossless (ALAC).
- Enable metadata and artwork retention so artist, album, and cover art carry over.
- Convert, then spot-check one track to confirm it played and tagged correctly.
Because FLAC and ALAC are both lossless, a FLAC-to-ALAC conversion loses nothing. Same with CD rips done in lossless. This route only applies to music you actually own, not streamed catalog tracks still under DRM.
Method 2: Use a dedicated Apple Music converter for catalog tracks
For songs pulled from the Apple Music catalog, you need software designed to handle the FairPlay layer and export clean ALAC. These desktop tools decode the protected track and re-encode it into a standalone ALAC file with tags and artwork attached.
When picking one, the features that actually matter are:
- ALAC output with selectable bit depth and sample rate, so you can hold onto that 24-bit resolution instead of quietly downsampling to CD quality.
- Batch conversion, because doing an album one track at a time gets old fast.
- Full metadata and artwork retention, since an untagged lossless library is miserable to browse.
- Sensible speed, as some tools work in real time and a large library will eat your evening.
Load a track, set the format to Apple Lossless, point it at the highest quality your source allows, and let it run. As long as Lossless was enabled at the source, the output should match the original closely.
Method 3: The free MP3 route when portability beats archiving
Worth being honest with yourself here about what you actually need. ALAC is excellent for a permanent archive and for an Apple-centric setup where storage is cheap and you want every bit preserved. But lossless files are large, and a lot of everyday situations don’t call for them: gym earbuds, an old car stereo, a basic player, a phone you’d rather not fill up.
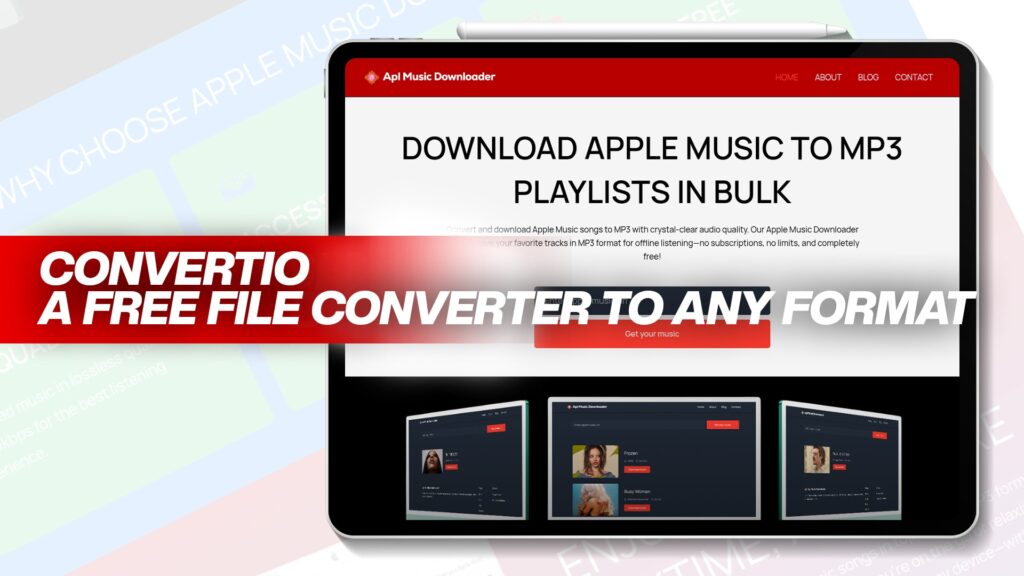
If the real goal is just keeping your favorite Apple Music tracks for offline listening on anything, a free converter often makes more sense than building a heavyweight lossless library. A tool like Apl Music Downloader saves Apple Music songs as MP3 with clear, clean audio, no subscription, no limits, and no cost. The files play on practically everything and take a fraction of the space of ALAC.
MP3 is lossy, so it’s not the format for a reference archive — that part should be clear. But for loading a phone before a trip or feeding an older device, the difference is inaudible on typical earbuds and the convenience wins easily. If you go this way, push the bitrate up: a 320 kbps Apple Music downloader sounds noticeably crisper than the low-bitrate defaults some converters fall back to. Many listeners run two libraries on purpose — ALAC at home for the good speakers, high-bitrate MP3 on the phone for everything else. That pairing covers nearly every scenario without forcing one compromise to rule them all.
It also helps to keep your offline files organized from the start. A short guide on how to save Apple Music songs offline covers folder structure and tagging habits that save you headaches once the library grows past a few hundred tracks.
Step-by-step: an ALAC conversion that stays lossless
Pulling it together, here’s a workflow that won’t secretly downgrade your audio:
- Enable Lossless or Hi-Res Lossless in Apple Music settings first. This is the non-negotiable step. A lossy source gives a lossy result no matter what format you choose.
- Re-download any tracks you grabbed earlier at lower quality so you’re working from the lossless version.
- Choose your method. Files you own go through a free converter or the Music app’s built-in option (Method 1). Catalog tracks need a dedicated converter (Method 2). Anything you just want portable can go to high-bitrate MP3 (Method 3).
- Set the output correctly. For ALAC, match the source resolution. Don’t downsample a 24-bit/96 kHz track to 16-bit/44.1 kHz unless you specifically want the smaller file.
- Keep your tags. Turn on metadata and artwork retention so the library stays browsable.
- Verify one track before batch-converting everything. Play it, check the file properties, confirm the bit depth and sample rate are what you expected. Fixing a setting now beats redoing 500 songs later.
Getting the quality settings right
A few details decide whether your ALAC collection is great or merely adequate:
Bit depth and sample rate. If the source is Hi-Res Lossless at 24-bit/192 kHz, keep it there. Downsampling to save space is fine when you do it on purpose, not by accident because a converter defaulted to CD quality.
Metadata. ALAC tags handle artist, album, track number, year, genre, and embedded artwork well. A converter that strips tags leaves you with a folder of “Track 01” files, which is a pain to live with later.
Gapless playback. For live albums or continuous mixes, confirm your tool preserves gapless info so tracks flow into each other the way they’re meant to.
Verification. Get into the habit of checking one converted file’s properties. On a Mac, the Get Info window shows sample size and sample rate. Seeing 24-bit where you expected 24-bit is a small reassurance that pays off across a big library.
A quick word on legality
This matters, so don’t skip past it. Converting music for your own personal, offline use generally sits in a different category from sharing or distributing it. Streaming services also set terms of service governing what you can do with downloaded content, and those terms aren’t identical to copyright law.
Rather than hand you a blanket verdict, the responsible move is to understand the rules where you live and what Apple’s terms actually say. There’s a clear breakdown of whether it’s legal to convert Apple Music and how personal use factors in. Read it, keep your conversions to yourself, don’t redistribute, and you’ll stay on the sensible side of the line.
Common Questions asked by Users
If Apple Music is already ALAC, what am I actually converting? You’re producing a standalone, DRM-free ALAC file you own outright. Same Apple Lossless quality, but free of FairPlay protection, so it plays anywhere and survives a lapsed subscription.
Does converting FLAC or CD audio to ALAC lose quality? No. Both are lossless, so the conversion is bit-perfect. Only the container changes; the audio data is identical.
Can I turn a regular AAC download into lossless ALAC? No. AAC is lossy. Converting it to ALAC just wraps already-compressed audio in a bigger file. Start from a lossless source or you’re only fooling yourself.
Is ALAC better than FLAC? Not in sound — they’re equivalent. ALAC fits the Apple ecosystem perfectly; FLAC plays on more non-Apple gear. Pick based on your devices.
Do I need Hi-Res Lossless turned on? Only if your playback chain can use it. Most headphones and built-in DACs top out below 24-bit/192 kHz, so standard Lossless is plenty for the majority of setups. Hi-Res pays off mainly with a capable external DAC and good headphones or speakers.
The bottom line
Converting Apple Music to ALAC in 2026 isn’t about changing the format — the lossless catalog is already Apple Lossless. It’s about turning borrowed, DRM-locked streams into clean ALAC files you genuinely own, with every bit of that original quality intact.
Start by enabling Lossless so your source is truly lossless. Use a free converter or the Music app’s built-in tool for files you own, a dedicated converter for catalog tracks, and don’t dismiss high-bitrate MP3 when portability matters more than archival perfection. Keep your metadata, verify a track before you batch the whole library, and stay on the right side of personal-use rules.
Do that, and you end up with a tidy, fully owned music collection that sounds exactly like the master and feels right at home on every Apple device you have.